Making Art with Little Kids – Part 2 (the advice)
In response to my rant on Making Art with Little Kids, here is my advice on how to approach art with young children. (You didn’t think I’d go off on a subject so dear to my heart only to leave you hanging, did you?)
The truth is, making art with little kids is an awesome experience. It reflects the joy of our Creator by creating ourselves. It expresses thoughts, ideas, emotions, and documents life. It promotes higher-order thinking and problem solving. It teaches experimentation. It encourages hard work and planning. It helps children to dream, imagine, and play. It builds fine motor skills, lots of them! It helps us understand history. It helps us judge the quality of products. It helps us make our own products. It teaches us constructive criticism. Shall I go on? My point is, making art with young children develops a ton of wonderful skills that everyone, even those not interested in “art”, will use in life.
Hopefully the following thoughts will give you a framework to think about approaching art with young children and also help you on your way with some practical tips.
Process is more important than product.
In math, we would teach children to add single digits before moving on to double digits. It wouldn’t make sense to do it any other way, right? Well, when you are expecting your kids to think about the finished product of a jack-o-lantern neatly glued to a piece of paper you are doing the equivalent of expecting them to add double digits. Your kid is not thinking about the jack-o-lantern or where it will hang or even that it’s Halloween. Your kid is probably thinking something like, “Look at the glue ooze out of this bottle! Wow! It goes faster when I squeeze hard! But now it’s not coming out. Is it clogged? What if I shake it?… hmmmm… what if I hold it this way?”
Think about all of the little things we have mastered that go into making art that are new to a child. How to hold a pencil, how hard to press, how to make it draw straight lines and curves and dashed lines, how to open a glue bottle, how hard to squeeze, how to get the glue flowing, how to control the flow of glue, how to use the right amount of glue depending on what kind of paper is being used…. It’s really quite complex when you think about it.
Give your child the space to actually learn these basics. For most children, it will take them until age 7 to 12 to master these skills so that they can do them without thinking. Then they are more ready and willing and able to focus on the idea or the final product instead of getting tangled up in lack-of-skills. And this will repeat even into adulthood every time a child is presented with new materials. (But be careful, emphasizing the final product for children or adults will often stunt the ability to make a picture in the first place. For example, if you knew you were going to frame something and hang it in your living room, you’d probably be a little more nervous and obsessive than if you were just trying to make something for no stated purpose.)
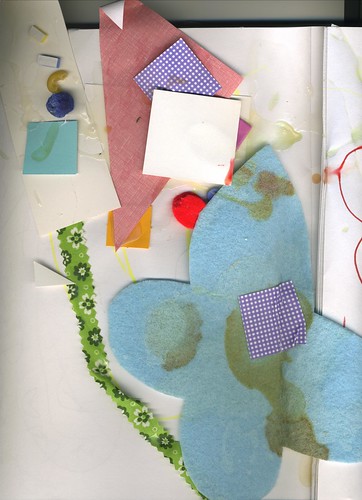
Here is a concrete example of how Caleb learns the basic skills of cutting and gluing. He has a very messy sketchbook that is his “cutting and gluing” book. He has cut almost every piece of paper into fringes around the edges. There are bits of everything glued to all of the pages. I gave him a bottle of flour + water to practice gluing because I don’t care if he wastes it by squeezing it for hours. I don’t plan on hanging it up or doing anything with it. He will literally stand at his work table and cut and glue for long periods of time. He is working on process, and neither of us has any inclination to display it or use it for any other purpose than experimenting.
Reward experimentation. Encourage it.
I recently was given a set of a new kind of oil/chalk pastels that I hadn’t used before. I sat down with a piece of scrap paper and just messed around with them. What happens if I try to blend colors? Several colors? Mix with other media? Will it do detailed work? How big of an area can I cover with them? Do they layer without blending? Can I scrape into it? What kind of texture options does it offer? You have to ask these questions every time you are presented with a new medium so that you know when, where, and how to use it effectively.
The same idea pertains to children. Especially those that have little or no background knowledge to build on. (Most middle school students I taught had no idea that a simple pencil could give you many different shade values by pressing hard or pressing lightly! Even though they had been using pencils for years!)
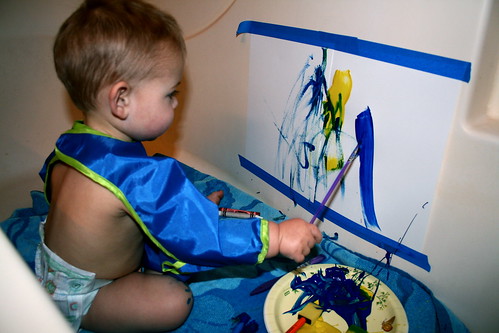
I will set out a new material for Caleb and just let him play with it. I may ask questions when it looks like his own thought process is slowing down (don’t interrupt their ideas with ideas of your own, let them exhaust their possibilities first). What happens if we drive cars through the paint? What happens if we put watercolor on top of that? What happens if we… What happens if we… What happens if we…
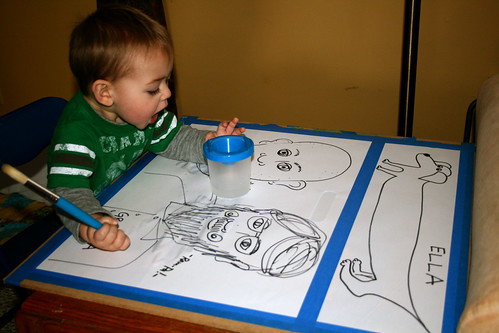
Here is some experimentation Caleb did with a Crayola marker:

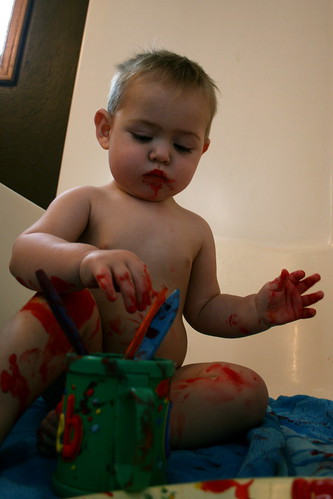
Then, reward the experimentation and not the product. “Look! You put bits of yarn in your paint! Isn’t that interesting. Some of the yarn stayed fuzzy and some of the yarn got stiff and hard. I bet you had to be careful to not get too messy. I can see that you were thinking hard!”
Hang that weird bit of experiment art up. Speak to your child and others about the experimentation happening. Caleb recently was looking at some egg shells in the sink and asked if they could be made into art. Good question. We did lots of stuff with them. Some worked, some didn’t. We learned from all of it. It was some seriously weird experiment art, which is the best kind for little kids learning to think and do.
You don’t have to hang it up.
Sometimes we hang up our art for a long time. Or a short time. Sometimes we give it to someone. Actually, I often encourage giving away things we’ve made or creating something with a specific person in mind. Sometimes we go, “Oh! This was a big mess! Let’s put it in the garbage! Yuck!” Sometimes we save it and turn it into another project later. We’ve used large “smear” paintings as gift wrap. We’ve turned some into greeting cards. Sometimes we will tear the papers to practice gluing something else or for collages. When Caleb is bigger we can try weaving scraps from old projects.
Kids will learn that different kinds of end results have different worth. Some are worthy of giving to others, some is worthy of being hung in a purchased frame, some is worthy of going in the trash. You can ask your child where he or she thinks it should go. They get very perceptive at this and it’s important for them to learn that it’s okay for some work to go in a frame and others to be be recycled. Just make sure you are keyed into your child and don’t destroy something he or she values. It’s wonderful to think of all the ways these skills will translate to adulthood and working in the “real world.” The ability to accept criticism, to know that all ideas are not good ideas, to be willing to call something a mess, etc.
It’s okay to do something focusing on technique. But keep it short and developmentally appropriate.
Once you see that your child is getting comfortable with a material or materials, and he or she seems to have exhausted all of the “what if” experimentations, go ahead and teach technique. I will usually say, “You have been coloring so well, let’s see if you can copy what Mama does and learn some of the ways big people and artists use crayons. Can you make a circle that goes round and round and round (draw)? This one is a wheel (draw). This one is a cookie (draw). Hmmm… lets make more round things like….”
You can even offer suggestions as to how the shape could be improved. Pay attention to the child’s tolerance level and stop as soon as it is waning. I have Caleb worked up to the point that we can draw together for up to 45 minutes of engagement. But we started out with maybe 30 seconds of engagement. Start with simple things like drawing a straight line, drawing a tiny line like it’s a little worm, drawing a heavy line like it’s a big fat snake, drawing a zig-zag line, etc. If you can work a story into it or a sense of fun you will probably win extra attention span from your child (see “Have fun.” below). I’ve done this with entire classes of children and it can get exceptionally fun. You can do the same thing with other media. We’ve recently been doing color washes with watercolors and are also starting to turn shapes into things (like circles in to birds and faces).
Now, I am not one of those hippie art teachers who thinks it’s all “freedom man.” I love the freedom of experimentation from Jackson Pollock, but I also adore the grandeur and visual impact of Michelangelo. Rembrandt emotionally strikes me to the core. And Chagall literally makes me fall head over heels (ha ha, art joke)! Picasso had bulls that looked like bulls and bulls that looked “bullish” but were not realistic. My point is that art has a variety of purposes that need to be considered when judging or creating. If Audubon had taken a “free” approach to his work, people at the time wouldn’t have known what all of those beautiful birds looked like. No, his purpose was to document life realistically and methodically so the many types of birds could be catalogued and identified. Thus, he had to have a realistic technique (it is fun to “pretend you are Audubon” with older children and have them make a sketchbook of wildlife observations). But Pollock’s purpose was to show a free expression in flowing paint (it’s not splattered, it’s flowing. Seriously, try it, it is not easy!) Matisse and the Fauves wanted to show strong emotionalism in their work. Michelangelo, who was actually a sculptor, showed his “sculpted reality” by creating ideal forms with paint. Children love to see varying purposes and approaches to art. They will learn that sometimes art is more free and sometimes it is more labored. This is good and will give them a more realistic sense of the world of art.
To help teach these purposes of art, you may enjoy The Art Book For Children (white book) and The Art Book for Children (Book two)
. We also love A Book About Design: Complicated Doesn’t Make It Good
for teaching early design concepts in a simple way.
I would often give assignments in art class where creativity was important. I would say, “I want yours to be different from everyone else’s project and I want it to represent something about who you are and how you think.” Creative. There were other assignments where I would say, “I want yours to look as much like mine as possible.” One of the best ways to learn how to paint or draw is to try to recreate a work of art by the masters. So, yes, technique matters. But for young children it shouldn’t be overly-emphasized, or even stressful. Once they have a stronger sense for how the materials work, their fine motor skills are developmentally ready, and they have an understanding of end-product they will be eager to learn more difficult concepts. But for now, be satisfied with and encourage the experimenting with bits of technique added in when appropriate. Make it clear when it is time to copy you and when it is time to experiment independently. Remember that good technique will come in time, but in early childhood you should emphasize process over product.
Have fun.
Young children love stories and imagination and play. Encourage this and participate in it yourself from time to time. I would do things like prep a watercolor tray for painting by pretending that it is a bathtub for ants and “we need to fill it up with water!” (prepping the paint). Then I’d say that the paintbrush wants to wash its hair in the tub so we should swish it around really good (loading the brush). The we could “sweep the floor” with our broom on the paper (painting). And we want to clean (cover) all of the paper (setting a ground). There are many wonderful play-associations to make in art.
Reduce your stress by being prepared.
I have met many moms who say, “That’s so great that you do so much art with your kids, mine are lucky to get to color because I can’t stand the mess.”
To this I would say, fine. Don’t do anything that stresses out you and your family.
But… Is there a way that it could be possible to create art without the mess (or the stress or the cost or whatever it is that is keeping you from doing it)? Here are some ideas.
If the mess is what’s stopping you, here is what I do. First, I have many sturdy art boards cut out of smooth press board (a few dollars at Home Depot, they’ll cut them for you). Several of them are cut to exactly fit the top of a dresser that Caleb works on. I don’t care if he gets paint on them. It dries, we use them again. I use painter’s tape (which I reuse until it is no longer sticky) to attach paper to the boards so the paper will stay in place. This helps the kids to work on a “non-slidey” surface and also keeps them from dropping a messy paper on the floor.
If it is nice outside, they work on the boards outside (because who cares if grass gets messy). If it is rainy they work on a tile floor, in my art studio, over a clear plastic shower curtain, or in the bathtub.

Actually, when Caleb was young, the bathtub was the rockstar painting place. I’d tape up paper, let him paint and smear, then wash him and the walls of the tub. Done. He was going to get a bath anyways, might as well let him paint first.
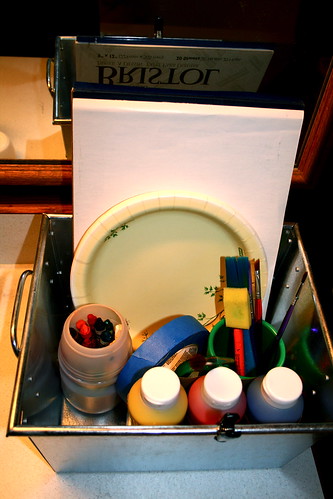
Secondly, you should have a clean up plan in mind. For me, I just set the art boards aside until the art dries. No cleaning a table or whatever. I then have a small washtub with a washcloth that I put a bit of warm water and soap in and I first wash my kid, then we drop the paintbrushes, etc. in there and I set it in my laundry room until I have time to wash it. Then I just clean and rinse that stuff. If we are outside, I just hose it all off. Caleb wears an apron. Oh, and I often will use cheap paper plates as his paint palette and then throw them away when he’s done.
Have your art supplies ready. Keep them in totes ready to go. I keep ours all easily accessible, but up high (so little hands can’t reach them when I’m not around… hopefully) in various little buckets and tins. Then, when Caleb says, “I want to do play dough.” I say I will give it to him when his apron is on. Once it’s on, I lift down the supplies, set them on an art board and he plays with it. When he’s done, we throw all of the supplies back in the bin and put them back up high. This is much easier than having stuff all over the house or not being sure where things are.
Another thing I do that works well is having an art/craft idea book open on his work space. I actually keep mine on a cookbook stand or clip it on the wall with giant metal clips. When we don’t know what to do, we turn the pages until we find something we like (we currently have). That, combined with having art supplies on the ready, means I NEVER PLAN IN ADVANCE. (Who has that kind of time?)
If you’re missing a supply that the book calls for, improvise and use something else. Your kid will learn to think of great things. Recently an activity required a carrot. After I told Caleb we didn’t have one, he thought for a moment and said, “I know, let’s just use an orange pipe cleaner.” Yes, my little problem solver, that sounds like a great plan. (I actually think it’s better to teach kids to go with the flow and improvise instead of having a perfect lesson organized. Think of the life skills they are practicing!)
Of course, train your child about how to use art supplies responsibly. If Caleb treats something unwisely, then art time is immediately over. There was one time I didn’t let him touch paint for a month. When we finally got to use it again he was older and wiser and knew the consequences and we haven’t had a paint problem since. He knows how to clean up his own brushes now and how to wash his own hands and put on his own apron…. The more responsibility your child can learn the more likely it is you will give him or her the opportunity to create.
If cost is what is stopping you, it shouldn’t! Magazines or junk mail are awesome for cutting and gluing. You can roll them and tape them to make all kinds of crazy sculptures. Use the backs of other paper, cardboard boxes, pieces of wood, old clothing, or anything you can find to paint and glue on. I got a huge roll of paper at Home Depot that is used for drop cloths for $5 and I haven’t even used half of it. (Interesting… the cost difference between kid’s roll of art paper and drop cloth paper. They are often the same thing. Actually, the drop cloth paper is thicker, so I say be a rock star and get the drop cloth paper!)
As long as they are in this experiment phase, let them use a variety of tools and go inexpensive. Once they develop more skill and interest, buy better quality so that they have a better chance of being successful (ex. painting with a cheap paintbrush and watercolors is torture). Let your kid collect sticks or grass from outside and make interesting things to paint or scrape with. The only think I don’t go totally cheap on is paint. I usually buy it from an educational or art store, and I get the washable tempera (because it if isn’t washable, that stinks). However, I only buy the primary colors. Caleb already knows how to mix all of his colors and I never once explained it to him (the experimentation… it works!).
I said earlier that I used flour + water as glue. Put them it in recycled containers, your kids will love to experiment with different containers (ketchup bottle, eye dropper, baby bottle, etc.) Even paint brushes can be made. I could go on with many more ways to save money, but this is a starting place at least.
Thank you for reading my long (whoa… LONG!) rant. I am a tired mother so it is going unedited. Sorry. Hope it inspires at least one of you to plunge in! Feel free to contact me if you have questions. My current e-mail is stephklewis at gmail dot com (written in a spam-bot-avoiding fashion).
Happy art making!
Leave A Comment